


In this article, you are going to learn Spring boot and Rollbarintegration to handle the error. Proactively discover, predict, and resolve errors in real-time with Rollbar’s continuous code improvement platform.
Rollbar is error tracking software.
Rollbar is a cloud-based bug tracking and monitoring solution, hence this is a cloud-based solution so it's easy to integrate.
Let's integrate the rollbar with spring-boot.
Step 1: Create Rollbar Account
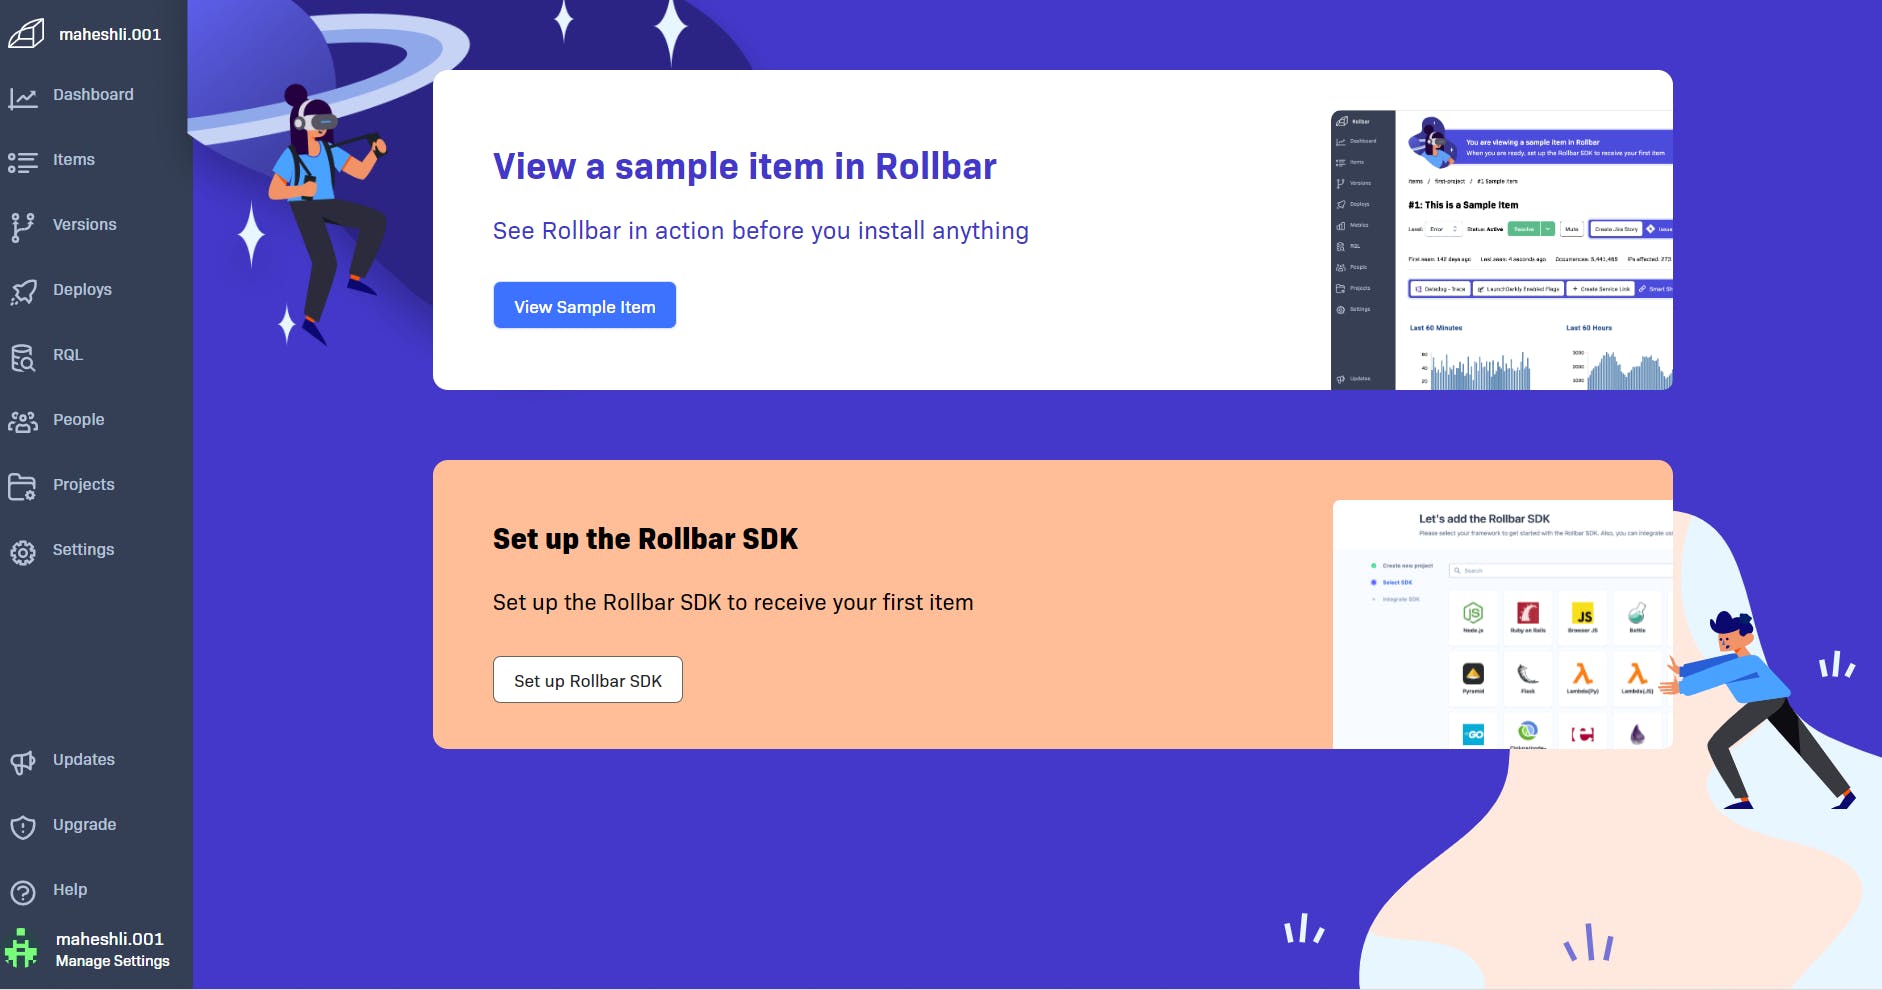
Once you signup with your credentials and skip all the screens and go to the dashboard, which will look like the below screenshot.
Step 2: Create New Project
Check the top right corner button, and click on the “New Project” button. Create a Project with whatever name is suitable for you.
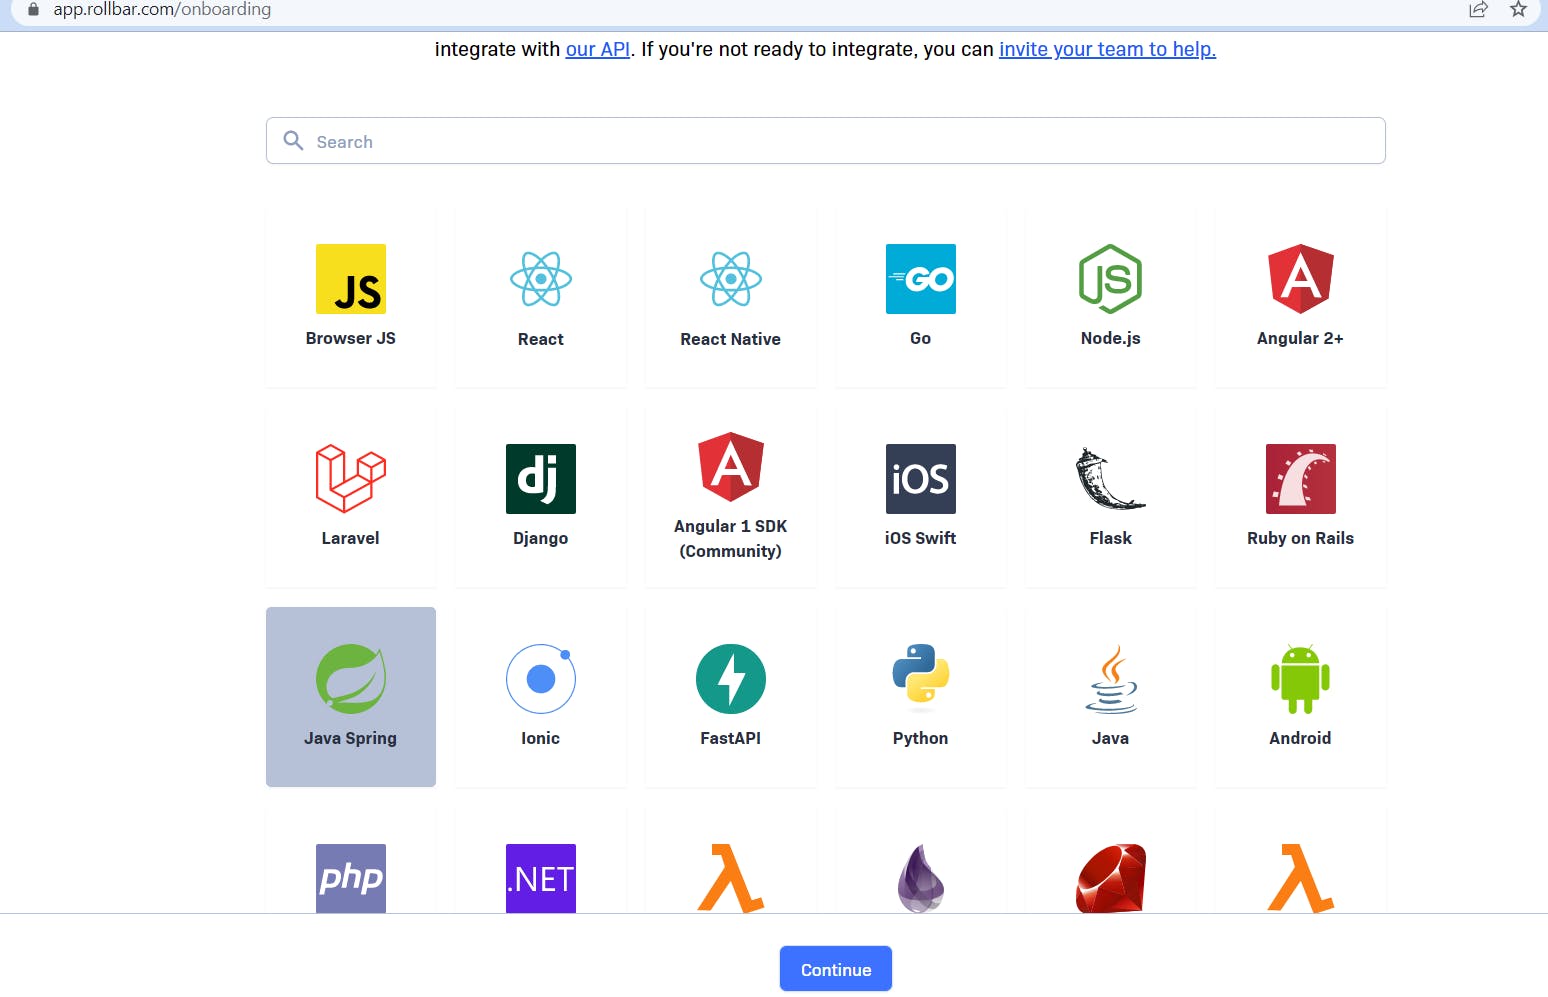
Step 3: Choose SDK
In the first go, it will show and ask you to choose SDK. Select the Java Spring SDK. It is mandated to select SDK with a project. For Spring boot or Spring project select Java Spring
Step 4: Integrate and setup the Project
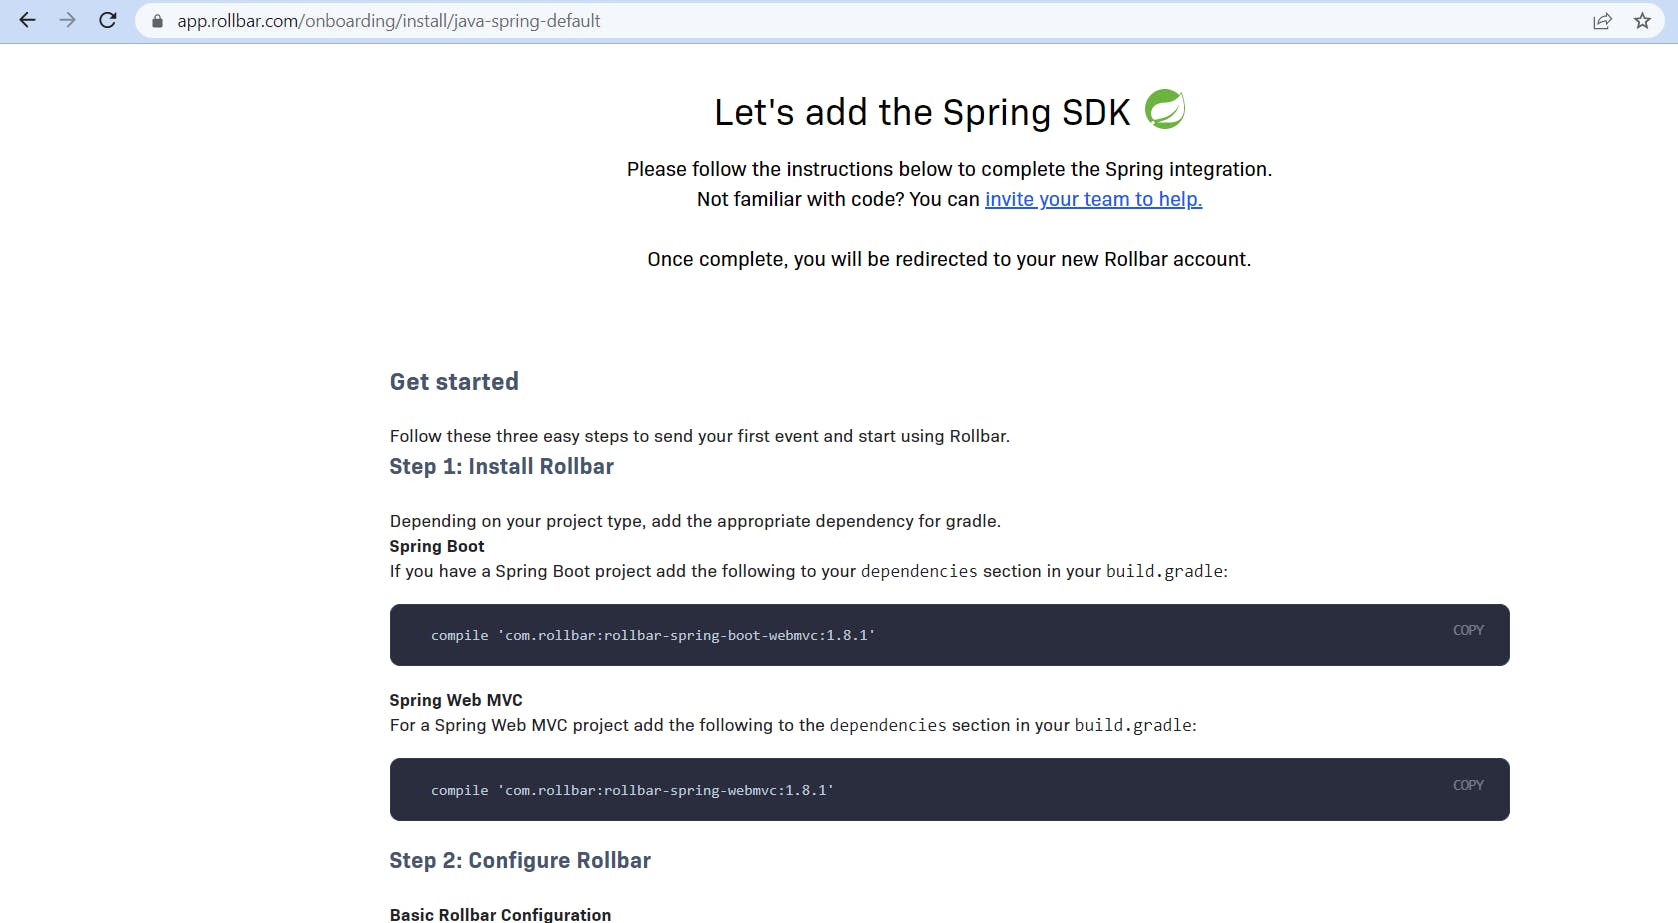
On this screen, you will get the sample code snippet and dependency details.
For Spring Boot:
implementation 'com.rollbar:rollbar-spring-boot-webmvc:1.8.1'
For Spring-based Project
implementation 'com.rollbar:rollbar-spring-webmvc:1.8.1'
Once this project set-up is done then go back to the dashboard.
Step 5: Generate Access Token
To get the project access token click on the left sidebar menu projects button and select your project and later the project access token button. Project access token helps you to connect the spring boot application to the specific rollbar project. This access token is like an identifier.
On this screen, it will show different tokens like, read, post_server_item, post_client_item , and write. For our integration Copy post_server_item token
For the security reason not provided a screenshot.
Step 6: Create Spring Boot Project
Create a spring boot project with start.spring.io or any editor or vs code editor.
Step 7: Coding
Let us do some coding, and add dependency and code snippets.
build.gradle
implementation 'com.rollbar:rollbar-spring-boot-webmvc:1.8.1'
RollbarConfiguration.java
@Configuration
public class RollbarConfiguration {
    private final String token = "<YOUR ACCESS TOKEN>";
    @Bean(name = "rollbar")
    public Rollbar getRollbar() {
        return new Rollbar(getConfig());
    }

    public Config getConfig() {
        return ConfigBuilder.withAccessToken(token)
                .environment().build();
    }

}
Create a utility class or service to handle different messages.
ApplicationErrorHandlerService.java
public interface ApplicationErrorHandlerService {
    void sendError(Exception e);
    void sendError(Exception e, String message);
    void sendInfo(Exception e);
    void sendInfo(Exception e, String message);
    void sendDebug(Exception e);
    void sendDebug(Exception e, String message);
}
Now let us write an implementation for the above interface.
RollbarErrorHandlerServiceImpl.java
import com.rollbar.notifier.Rollbar;
import org.springframework.beans.factory.annotation.Autowired;
import org.springframework.beans.factory.annotation.Qualifier;
import org.springframework.stereotype.Service;

@Service
public class RollbarErrorHandlerServiceImpl implements ApplicationErrorHandlerService {
    private final Rollbar rollbar;

    @Autowired
    public RollbarErrorHandlerService(@Qualifier("rollbar") Rollbar rollbar) {
        this.rollbar = rollbar;
    }

    @Override
    public void sendError(Exception e) {
        rollbar.error(e);
    }

    @Override
    public void sendError(Exception e, String message) {
        rollbar.error(e,message);
    }

    @Override
    public void sendInfo(Exception e) {
        rollbar.info(e);
    }

    @Override
    public void sendInfo(Exception e, String message) {
        rollbar.info(e,message);
    }

    @Override
    public void sendDebug(Exception e) {
        rollbar.debug(e);
    }

    @Override
    public void sendDebug(Exception e, String message) {
        rollbar.debug(e,message);
    }
}
That's it, let us run the spring boot application and generate some logs based on your requirement.
Step 8: Verification
Once you run your application then check is this pushing logs and error messages to the rollbar server or not.
GO to dashboard --> select Project -> Environment.
And you are able to see the error message.
Conclusion:
This article demonstrated the steps of integration of rollbar and spring boot and how you can create a smooth experience and proactively handle exceptions and error messages.
More such articles:
https://www.youtube.com/channel/UCiTaHm1AYqMS4F4L9zyO7qA
==========================**=========================
If this article adds any value for you then please clap and comment.
Let’s connect on Stackoverflow, LinkedIn, & Twitter.